How to Transfer iTunes Playlists To Android Devices
“Are there any available ways of how to transfer iTunes playlists to Android devices?” You probably have read or heard about the same query on many community platforms and discussions, but have you found a reliable article already showing you several solutions of how to transfer iTunes playlists to Android gadgets?
Usually, those people who just recently switched from using their iOS devices like iPhones or iPads to Android ones are the users who are looking for such methods of how to transfer iTunes playlists to Android.
Of course, if you got some songs on your iTunes library and you wish to continue accessing them even if you are to use a new device (like an Android one), you must know how you can move the tracks.
It might be true that the usual thinking is that the iTunes app has a great association with Apple-supported devices like iPhones or iPads and not that much on Android ones. But this statement does not mean that you can’t have the transfer done successfully.
With the help of great solutions that we’ll share in this article and an amazing and professional software application, you can do what you want to do! Let’s start learning how to transfer iTunes playlists to Android gadgets then!
Article Content Part 1. Can iTunes Playlists Be Transferred?Part 2. How to Transfer iTunes Playlist to Android?Part 3. Best Method to Transfer iTunes Playlist to AndroidPart 4. Summary
Part 1. Can iTunes Playlists Be Transferred?
You are surely the iTunes application because you surely found out how great the app is. In fact, you can have the iTunes app downloaded on both your Mac and Windows PC.
The iTunes application is very popular as it can serve not only as a music streaming platform (as you can easily purchase songs from the iTunes Store as you wish) but also as an app where you can store your media files and content like photos, videos, films, audiobooks, and more. It’s a great app where you can manage your files and library as you wish.
Since this article will be tackling more about the iTunes app and how to transfer iTunes playlists to Android gadgets, it must be answered right away that the transfer is surely possible! You just need to learn what correct procedures and solutions you must follow.
Luckily, we got here a bunch of solutions for you to transfer iTunes playlists to Android devices with ease. We’ll start discussing all of them as we move to the second portion of this post.
Part 2. How to Transfer iTunes Playlist to Android?
As we have been saying in the previous parts, in this section of the post, we will be dealing with the solutions to how to transfer iTunes playlists to Android devices. We got here three easy-to-follow and basic solutions that you can check out and try doing.
Solution 1. Transfer iTunes Playlist to Android via USB
Actually, you might have thought about this idea already. One of the basic things that you can do to transfer iTunes playlists to Android devices is via the use of a USB cable. This is so easy to do since the transfer would be manual (copying and pasting the iTunes playlists) – from your PC’s iTunes media folder to your Android device. You just have to make sure that this "Copy files to iTunes Media folder when adding to library" option has been turned on or enabled on your iTunes app. By making sure, all your iTunes music files, playlists, and even videos will automatically be saved on your computer’s iTunes media folder.
Make sure as well that your Android device will be connected properly to the computer where the iTunes media files or iTunes playlists will come from. You can check if the connection has been made successfully by looking at the devices under your computer’s “File Explorer”.
This process of transferring iTunes files to your Android is very helpful if you are to move only those that are unprotected.
Solution 2. Transfer iTunes Playlist to Android Using Apple Music
Apart from using a USB cable – where the transfer would be manual, you can also use Apple Music as one method of how to transfer iTunes playlists to Android devices. You will notice that you can’t have the iTunes app on your Android device, but you can install the Apple Music app on it. Through the Apple Music app, the syncing of the iTunes playlists to your Android device can be made possible. However, to move forward, there are two important things you must take into consideration first.
- You must be signed in using the same Apple ID credentials on both your iTunes app on your computer and on your Apple Music app on the Android device in use.
- You must have an active Apple Music subscription.
Upon ensuring the above two things, you can just follow this procedure.
Step #1. On your PC, open the iTunes app and then tick the “Edit” button. From the new options, just choose “Preferences”.
Step #2. Head to the “General” tab. Look for the “iCloud Music Library” option and make sure it has been enabled. Afterward, click the “OK” button.
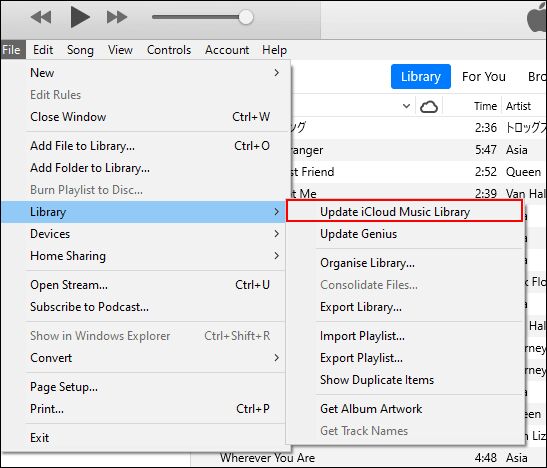
Step #3. If there is a need for the manual syncing of songs to the iCloud storage, tap on the “File” button, then “Library”, and then “Update iCloud Music Library”. This might take some time until the update and sync to your iCloud are finished. Unfortunately, you can’t monitor the status as there is no progress bar that can be seen.
Step #4. Once the syncing process has been done successfully, head to your Android device and opens your Apple Music app. Click the “Library” button at the bottom. All those iTunes playlists you synced to your iCloud will be displayed here.
Now, starts streaming using the Apple Music app on your Android device!
Solution 3. Sync iTunes Playlist with Google Play Music
Another way of how to transfer iTunes playlists to Android devices is via syncing of the iTunes playlists on your Google Play Music account.
The good thing with Google Play Music is that it might have been pre-installed already on your Android device – smartphone or tablet. It is even a great application (alongside Apple Music and Spotify) with numerous perks that are being offered to its users. Google Play Music can even let you upload up to 50,000 songs without paying any cent. So, using your Google Play Music account is indeed a good method to sync the iTunes playlist to Android devices.
Of course, we have here the procedure that you can use as a reference.
Step #1. On your personal computer, just head to the Google Play Store using your web browser and then tick “Music”. You have to click the “My Music” button afterward.
Step #2. You will then arrive at the “My Music” section after doing the successful login process using your Google account. There is a menu button that you shall see on the left side of the screen. Tap on it and from the options shown, you need to tick the “Upload Music” menu. A pop-up menu will be displayed and will ask you to download “music manager” if you haven’t yet.
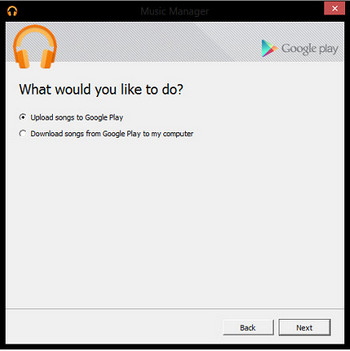
Step #3. After downloading the “Music Manager” on your PC, just log in using the same account you are using. You have to check the “Upload songs to Google Play” option and then tap “Next” to proceed.
Step #4. You can now select the iTunes app as the folder or library to use during the uploading of playlists to your Google Play Music. Just tap on the “Next” button to begin the uploading process.
Step #5. On your Android device – phone or tablet, open the Google Play Music application. Under the library section, you shall be able to see all those iTunes playlists that you just recently uploaded to your Google Play Music account. You even have the ability to download them to the Android device you are using if you wish to stream them offline.
These three solutions of how to transfer iTunes playlists to Android devices are indeed so great but take note that you can only use these three if you are to move iTunes tracks and playlists that are unprotected. You should know that the tracks you purchase from the iTunes Store are DRM protected. And so, moving them or accessing them on any device won’t be possible. There is a need to have the protection removed first. So how to transfer iTunes playlists to Android devices if you got iTunes playlists that are protected? Learn the answer to this question as we head to the third part.
Part 3. Best Method to Transfer iTunes Playlist to Android
It is always a dilemma for users who want to transfer iTunes playlists to Android devices if the tracks are protected by Apple’s FairPlay protection because there will always be a limitation present while trying to move the tracks and play them on other devices.
To solve this, we are happy to share how good this professional software application is – the TunesFun Apple Music Converter.
The TunesFun Apple Music Converter is very capable of converting the iTunes songs into MP3 and other formats supported. It can download the converted songs as well. With its too fast conversion speed – at a 10x faster level compared to other professional converters, you can expect that the files will immediately be available only after a few minutes. Added to this, the quality of the files won’t be at risk since 100% quality will be maintained even after the processing. If you worry that much about the ID tags and metadata information, those will also be kept!
It must also be noted that the TunesFun Apple Music Converter can also work as an audiobook converter. So, if you also have audiobooks that you wish to transform to MP3 or any other output format, that can be made possible as well!
Also, the app has a user interface that isn’t delicate at all. So, this can surely be used even by beginners.
To prove, we have here the three easy methods to convert and download the protected iTunes or Apple Music songs that you have to finally be able to transfer to your Android device.
Step #1. We suggest visiting the official website of TunesFun Apple Music Converter to see all those things needed to have the app installed on your PC. Once completed, just simply install and then launch. Afterward, start choosing and previewing those songs you wish to convert to MP3 format.
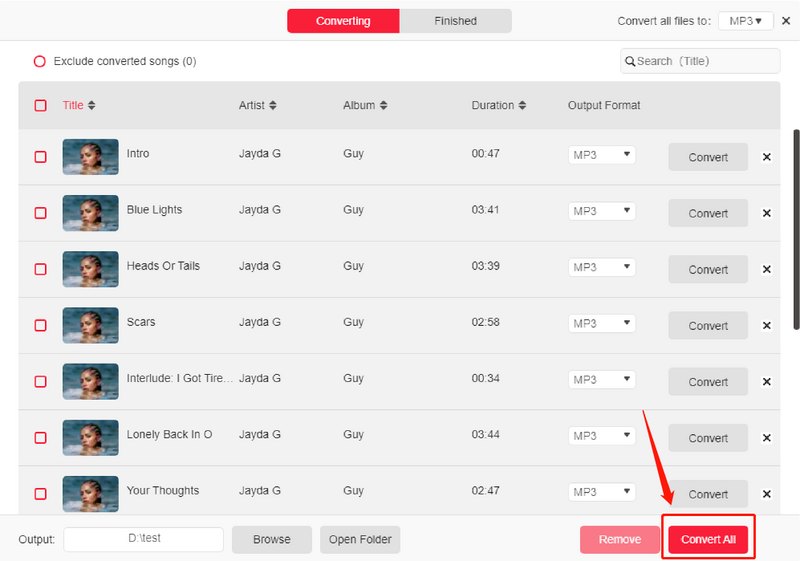
Step #2. At the bottom area, there are options displayed. This is where you can set the output format to MP3 and where you can edit some output settings as you prefer. You can also define an output path for easy access of the converted files after the conversion process.
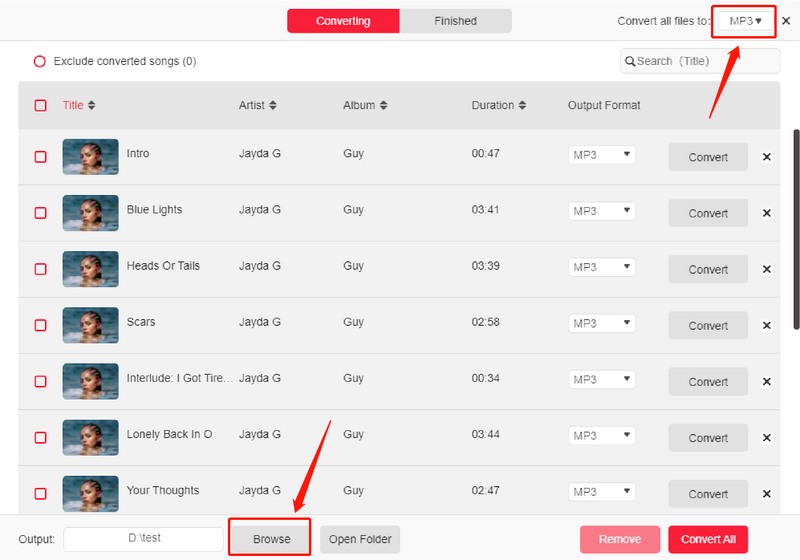
Step #3. Tick the “Convert” button once you are okay with the overall setup you defined in the second step. By doing so, the app will start converting the files as well as removing their DRM protection. Since the app works too fast, you can expect the transformed files to be ready in just a few minutes.
Now that you have the unprotected songs, you can just simply connect your Android device to your computer and start copying and pasting the converted iTunes playlists. Additionally, you can even have the tracks moved to other devices and media players.
Part 4. Summary
To transfer iTunes playlists to Android devices, you can check out lots of solutions available. We have highlighted three of the most common solutions in this post and even shared about the best method of keeping the tracks on your devices forever – through the use of the TunesFun Apple Music Converter. If you got any other solutions you tried before or you recommend, we’d love to see some comments in the below section.
 Home
Home
Leave a comment