Can You Burn a CD From Spotify: Answer and Best Guide
“Can you burn a CD from Spotify? How can this be done? I have tried processing and converting Spotify songs but there are always issues along the way. Can this be fixed?”
Nowadays, with lots of technological advancements, only a few people would prefer to keep their music files or favorites on CDs. We can’t deny this fact.
However, for some who find it still useful to do especially as burning songs on CDs makes it easier to listen to the tracks as they would be saved in one location (rather than jumping into different albums), answering the “can you burn a CD from Spotify?” would be vital (for those who are also Spotify enthusiasts). Thus, we had this post created.
Having a personal CD that contains your favorite songs would make it very convenient for you to stream them on any sound system, PC, or CD player.
If you are a Spotify fanatic and you’d like the “Can you burn a CD from Spotify?” query to be answered, you have chosen the right page. We can’t blame you for being a Spotify user who’d love to access all your favorites in one location, thus, we’d like to help!
The “Whether you can burn a CD from Spotify?” query shall be answered right away as you head over to the first part.
Article Content Part 1: Answering the “Can You Burn a CD from Spotify?” QueryPart 2: Best Tool to Remove Spotify Songs’ DRM ProtectionPart 3: Burning Unprotected and Converted Spotify Songs to a CDPart 4: Summary
Part 1: Answering the “Can You Burn a CD from Spotify?” Query
Spotify is truly an amazing platform that gives several amazing perks to its users. Aside from having several subscription plans, it is a great advantage that it even offers a free version that anyone can use. If you have been using Spotify for quite some time already, you have probably created various personalized playlists tailoring your taste to music streaming.

If you are thinking of making these favorite tracks of yours saved on a CD, then you are surely curious about the same query – “Can you burn a CD from Spotify?”. As promised, let’s get that answered here.
Regardless if you are a free account user or a Premium account owner (who has the ability to download Spotify songs for offline listening), it could be challenging to burn a CD from Spotify. This is because the tracks are protected with DRM which restricts the tracks from being modified and being accessed on unauthorized devices.
So, can you burn a CD from Spotify? Of course, there would always be workarounds! You can definitely get your Spotify playlists saved on a CD via an alternative method that we are to share in this article.
In fact, the tool that we recommend you use will be presented in the second part. Upon addressing the issue with Spotify songs’ DRM protection, what you have to do next is to accomplish the “burning” process which can be done in multiple ways (to be discussed in the third section).
Are you excited to finally know how you can burn a CD from Spotify? Jump into the next part then!
Part 2: Best Tool to Remove Spotify Songs’ DRM Protection
As also mentioned in the previous part of this article, the first thing that must be done to proceed with the process of saving Spotify tracks on a CD is to get rid of the songs’ protection.
Answering the “Can you burn a CD from Spotify?” query isn’t enough. The solution to the dilemma should be presented as well. In this case, to address the initial problem, we should be using a trusted and reliable tool. It is suggested that you try using the TunesFun Spotify Music Converter.
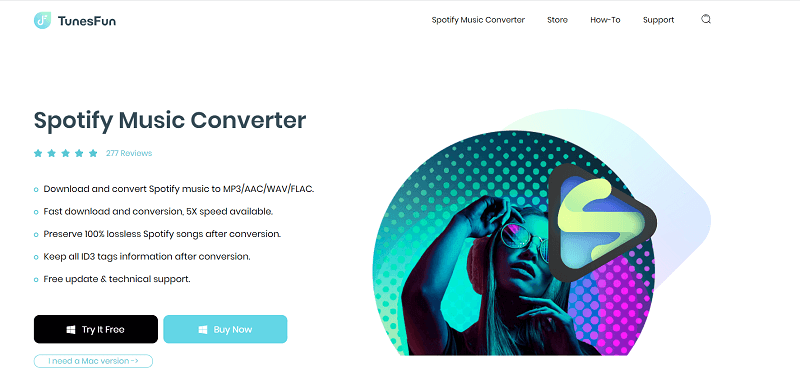
Of course, this has the ability to remove Spotify songs’ DRM protection within a snap! And apart from this great feature, there are more that one can enjoy from using it.
Through the TunesFun Spotify Music Converter, Spotify songs can even be converted to flexible formats like MP3, WAV, AAC, and FLAC making them playable on most devices and media players.
It has a fast conversion rate that makes the whole process efficient for the users.
The songs’ original quality and ID tags would even be preserved afterward.
Using this tool should be so easy even for first-timers as it has a simple UI.
Installing it won’t be a problem as well since it’s supported by both Windows and Mac OS.
In order to proceed with the conversion of Spotify songs via this tool, TunesFun Spotify Music Converter, the below are the steps that must be followed.
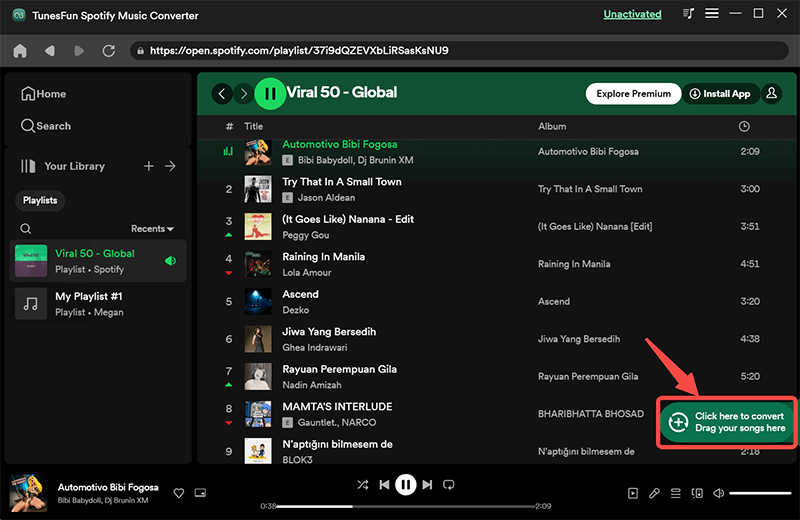
Step #1. Once you have met all the requirements prior to installing the TunesFun Spotify Music Converter on your PC, proceed and install it. Launch it afterward. On the main page, you may start adding Spotify songs. Choosing bunches should be all good as this app supports batch conversion.
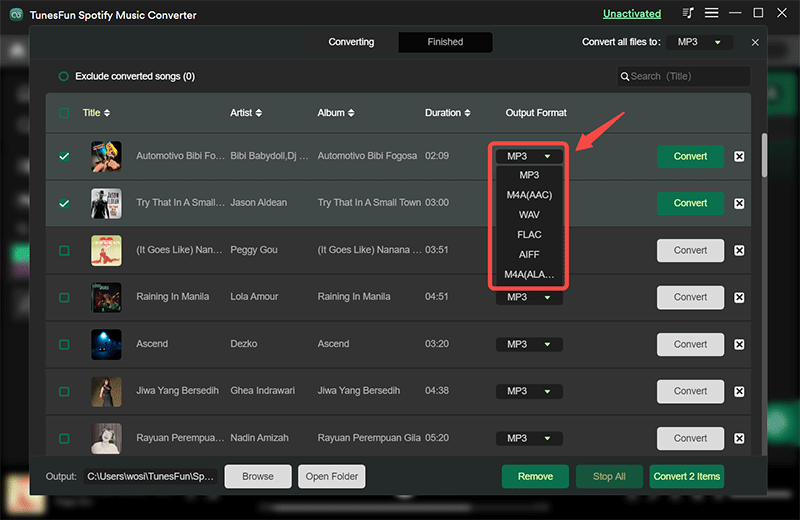
Step #2. From the available output formats, select the one you prefer using. But it’s always good to recommend setting up MP3.
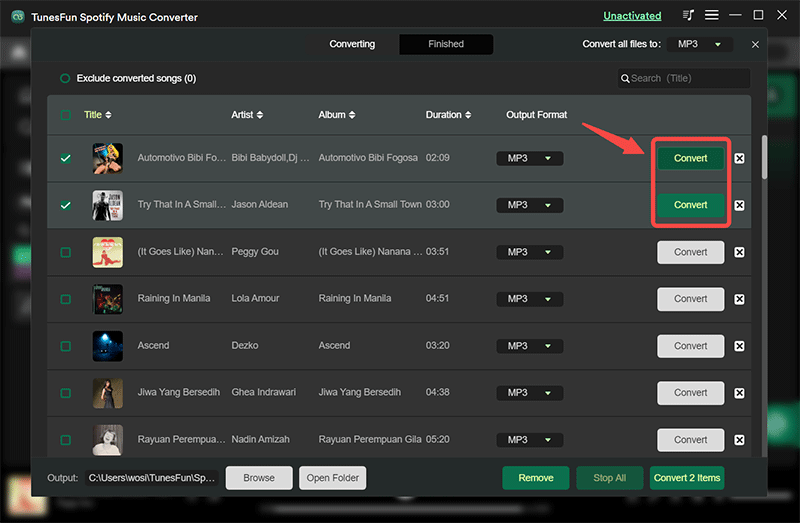
Step #3. Once you tap the “Convert” button, the TunesFun Spotify Music Converter shall begin the conversion of the added Spotify songs. While the transformation of the tracks is ongoing, the removal of their protection shall also happen at the same time. This shall only last for a few minutes given that this tool works at a fast speed.
Now that you have the converted and DRM-free songs saved on your PC, to complete the process of getting them burned to a CD, you have to check some free tools that you can use. As also previously stated, we have numerous ways to introduce this as you head over to the third part.
Part 3: Burning Unprotected and Converted Spotify Songs to a CD
Now that we have already answered the “Can you burn a CD from Spotify?” query and have accomplished the process of removing Spotify songs’ DRM protection, the next step that must be done is to finally burn these unprotected songs to a CD!
As mentioned in the earlier parts of this article, there are multiple ways of doing it. We will be discussing some of them in this section of the article. Having several options to choose from would be good enough, right?
#1. Burning Unprotected Spotify Songs to a CD Using iTunes
The iTunes is indeed very helpful in most ways. You can even use it to burn songs on your CD! If you’d like to try, you can just follow the below procedure.
Step #1. Create a New Playlist for the Unprotected Spotify Songs
Make sure that you are using the latest version of the iTunes app on your PC. Launch it and then start by creating a new playlist for unprotected and converted Spotify songs. To do so, tap the “File” button at the top, and then choose “New”, then “Playlist”. Once created, locate the converted tracks and add them to this new playlist.
Step #2. Look for the Function to Burn to a CD
Insert a blank CD onto your PC’s CD drive. Choose the “File” menu afterward, and then look for the “Burn Playlist to Disc” option.
Step #3. Start the Burning Process
A pop-up window shall be displayed on your screen. This will show the burning settings which you can modify to your liking. Choosing the speed and format that you prefer can be done here. Once you’re all good with the setup, you can now just tap the “Burn” menu that is at the bottom section of your screen.
The iTunes app shall then begin the process of burning the Spotify songs onto the inserted CD.
#2. Burning Unprotected Spotify Songs to a CD Using the Windows Media Player
Aside from using the iTunes app, you can also use the Windows Media Player. Here are the steps that must be taken.
Step #1. Import the Unprotected Spotify Songs
Open the Windows Media Player on your PC. Importing unprotected Spotify songs is the first step that must be done. A new playlist must be created. You can do this by clicking the “Playlist” panel. Once done, start dragging and dropping the songs onto it. Also, don’t forget to add a blank CD to your PC’s CD drive.
Step #2. Look for the “Burn” Function
Once the songs have been uploaded to the new playlist, look for the “Burn” option that should be at the top area of the screen and then hit it. The newly created playlist that has the Spotify songs must be dragged onto the “Burn List” dock that’s at the right section of the screen.
Step #3. Start Burning the Songs to the CD
On the “Burn” panel, you must click the “menu” option. Choose the “Audio CD” option next. To finally get the burning process started, tap the “Start Burn” button. Once the process is completed, the CD that has the tracks in it will be ejected automatically.
You may now listen to the songs that are saved on the CD via your CD player!
#3. Burning Unprotected Spotify Songs to a CD Using the VLC Media Player
Another free tool that can help you burn unprotected and converted Spotify songs to a CD is the VLC Media Player. If you prefer using these over the first two options that were just presented, then keep on reading this section.
Step #1. Creation of a New Playlist
Open the VLC Media Player on your computer and then start by creating a new playlist wherein the unprotected tracks for burning shall be saved. Once a new playlist is created, have the songs added to it by dragging and dropping them.
Step #2. Ensure a Blank CD is Inserted on Your PC’s Drive
A blank CD must be inserted into your PC. Upon adding the songs, tap the “Media” button next. Afterward, select the “Convert/Save” option. The “Disc” button should be clicked next.
Step #3. Begin the “Burning” Process
Once the blank CD has been detected by VLC Media Player, you must tap the “Audio CD and Browse” option. Choose your blank CD before clicking the “Convert/Save” menu.
On the “Convert” screen, hit the “Browse” button in order to select which location you’d want VLC to save the tracks. Finally, to commence the burning process, press the “Convert/Save” button.
#4. Burning Unprotected Spotify Songs to a CD Using ImgBurn
Indeed, free tools like the previous three that were mentioned are good enough given that they can be used without the need to pay any amount. But just in case you are interested in using more professional apps that you can install on your Mac or Windows PC, then you can also try using “ImgBurn”. You may refer to the below guide if you’d like to use this tool.
Step #1. Download ImgBurn and install it on your PC.
Step #2. Launch the app and make sure that you have inserted a blank CD on your PC. On the main page, you have to tap the “Write files/folder to disc” menu. This will let you be on the “Burn CD” mode.
Step #3. To import the Spotify songs, click the “Browser for a folder” option next.
Step #4. The burning process shall start once the “folder-to-disc-shaped” menu has been tapped. A window shall also pop up on the screen asking you to confirm the folder to use for the burning process. You just have to click the “Yes” menu.
You just need to wait until the process is over!
Part 4: Summary
Indeed, it is great to find out more about the answer to this “Can you burn a CD from Spotify?” query. Since it is possible to save Spotify songs on CD, you may start doing it so you can enjoy listening to the songs as you like!
Don’t forget that using the TunesFun Spotify Music Converter would be the start of the whole procedure as you need to get the protection of the tracks removed first! Afterward, you can just choose a tool that would complete the burning process!
 Home
Home
Leave a comment