How to Turn on Offline Sync Google Docs [2025 Update]
Do you have any idea about how to turn on offline sync docs on Google? If you think that in the middle of editing docs, you might lose your internet connection, then it is a must for you to know more. And if you are into learning it the right way, we are here to guide you.
In this article, we are going to discuss the procedures for how to turn on offline sync Google docs. We are also going to know about what Offline Sync Google Drive is and how it works. There are a lot of things to know about the procedures, so we need to get started by knowing the things that we need first.
Also Read:
How To Mark The Playlist For Offline Sync
Article Content Part 1. Things to Know about Offline Sync Google DocsPart 2. How to Turn on Offline Sync Docs on GooglePart 3. Bonus: How to Access Spotify Music in More Convenient WayPart 4. To Summarize It All
Part 1. Things to Know about Offline Sync Google Docs
So, what is Offline Sync Google Docs? If you want to know how to manage online documents this one is a very widely used service. On the other hand, this would also require a very stable internet connection, but what will you do if you encounter a scenario where you do not have a stable internet connection? The said scenario would have caused Google Docs to force it to a stop.
Google has a feature called Offline Sync that allows you to access and edit your files on Google Slides, Google Docs, and Google Sheets, even without a stable internet connection. Any edits made while offline will be saved and applied to your files the next time you have an internet connection.
If you want to know how to turn on offline sync docs, you need to have a very comprehensive guide. As we all know, when it comes to making work easy, Google Drive would be a huge help. It is also good assistance if you have a very unstable internet connection. How to turn on Offline Sync Google docs, let's go through the following procedures.
Part 2. How to Turn on Offline Sync Docs on Google
So, how to turn on offline sync docs ? The procedures on how to turn on turn on offline sync Google docs are really simple. The said process would not even give you a hard time and would not cost you too much time. Let us see how to do it, below. We will share with you the procedures on how to turn turn on offline sync Google docs on Windows PC, or a Mac computer, let us get started below.
How to Turn on Offline Sync Google Docs on Windows PC
Step 1. Initially, you need to go to Google Chrome.
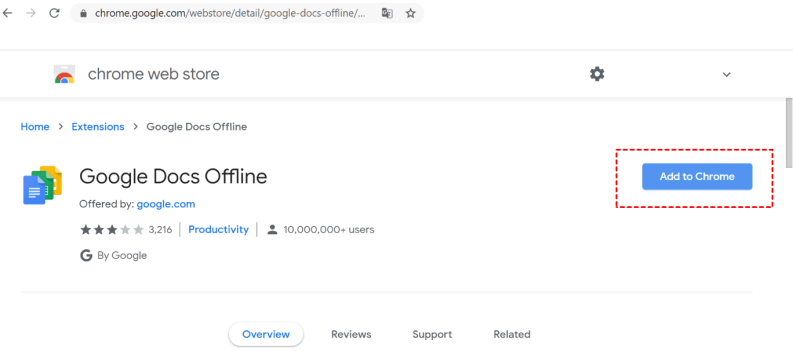
Step 2. You then have to go to the Chrome Webstore and then look for the Google Docs Offline Extension and then tap the option that says Add To Chrome Button.
Step 3. You will then be receiving a prompt asking you to sign in to your Google Account in case you are not yet signed in.
Step 4. You have to go to the website of Google Drive which is www.Drive.google.com.
Step 5. Launch the Google Drive, and then tap the Gear-like icon that you will see near the Search Drive box in order to launch Settings.
Step 6. Go to General.
Step 7. Go on and tap the Sync Google Docs, Slides, Sheets, and Drawing Files option on the computer that you are using so you can be able to edit the offline checkbox.
Step 8. Then tap Done, which you will see at the upper right side of the Settings page.
How to Turn on Offline Sync Google Docs on Mac
Step 1. On the home screen, you need to click the Apple icon from the upper left part of the screen.
Step 2. Choose System Preferences which you will see from the drop-down menu.
Step 3. Proceed to General which you will see at the pop-up that will appear.
Step 4. Choose the Default Web Browser and then choose the Google Chrome app from your list.
The said steps above are the ones that you have to do to set Google Chrome as your default browser. And to execute how to turn on offline sync docs on Google on Mac, here’s what you have to do:
Step 1. You need to open Chrome and then go to the Chrome Webstore.
Step 2. Look for Google Docs Offline and then you have to click the Add to Chrome button.
Step 3. Then go to Google Drive and launch Settings.
Step 4. Go to General starting from the left pane.
Step 5. Tap on Sync Google Sheets, Docs, Slides, and Drawings checkbox in order to enable it.
Step 6. Then you have to hit the Done button which is the blue-colored tab. By doing so, you are saving all the changes that you have made.
And there you are! These are the steps on how to turn on offline sync Google docs on your Windows PC, or your Mac computers! Once you are able to grasp the procedures then you are able to edit all your files even when you do not have an internet connection.
Part 3. Bonus: How to Access Spotify Music in More Convenient Way
We have learn how to turn on offline syny doc above. Would you believe how many ways are there for you to access music? If you are a music lover, you definitely know about Spotify! With the amazing features it has, who does not know about Spotify.
With a device and a stable internet connection, you can access music anytime using Spotify. Many people prefer the free plan, but the premium subscription has its perks. Even without internet access or in remote areas with poor signal, you can enjoy music through offline listening. Simply download your favorite songs using the premium plan. While this option comes with a cost, there is a way to experience the premium version without subscribing.
That is what the TunesFun Spotify Music Converter can do for you! You can listen to songs you love without any dilemma at an economical cost! This professional converter can provide you with almost anything that you would need when it comes to music accessibility, to help you be familiar with TunesFun Spotify Music Converter, we have a list of its features below.
- You can convert your chosen music files to flexible formats like MP3, FLAC, WAV, and a lot more! You can definitely get to access music using any device you own!
- Access the music you love conveniently and fast! The TunesFun Spotify Music Converter is designed to convert your music tracks at a very fast rate!
- Enjoy the best quality music files that you can really compare to the original files! You can even keep ID tags and metadata of music files as you want.
- Get the files you need to be converted conveniently through the use of the very sleek and easy-to-understand interface of the TunesFun Spotify Music Converter!
Let us see how can we utilize the TunesFun Spotify Music Converter, and get it to convert our chosen music files as soon as possible! Click to download and follow the step-by-step guide!
Step 1. Of course, we need the TunesFun Spotify Music Converter. Start downloading and converting music files by installing the TunesFun Spotify Music Converter on your computer. Then you can now add all the music tracks from Spotify that you wanted to convert.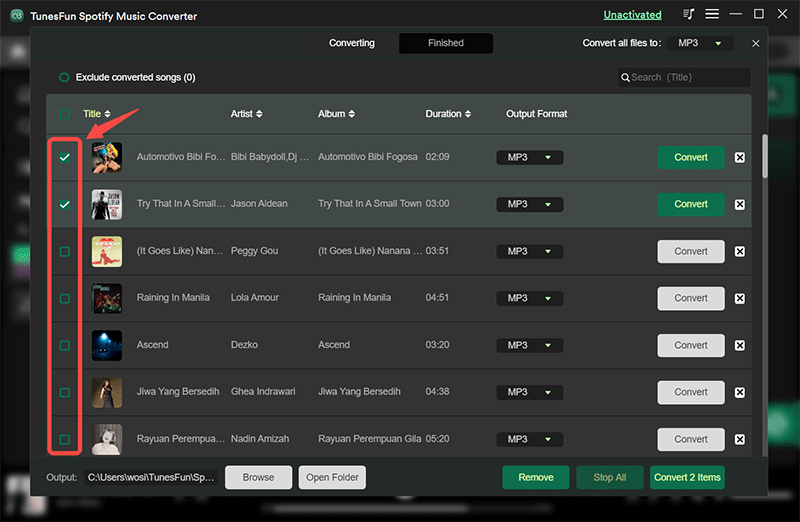
Step 2. Make a folder where to save your music files once the conversion has been completed and then you should not forget to choose the file format that you needed to have.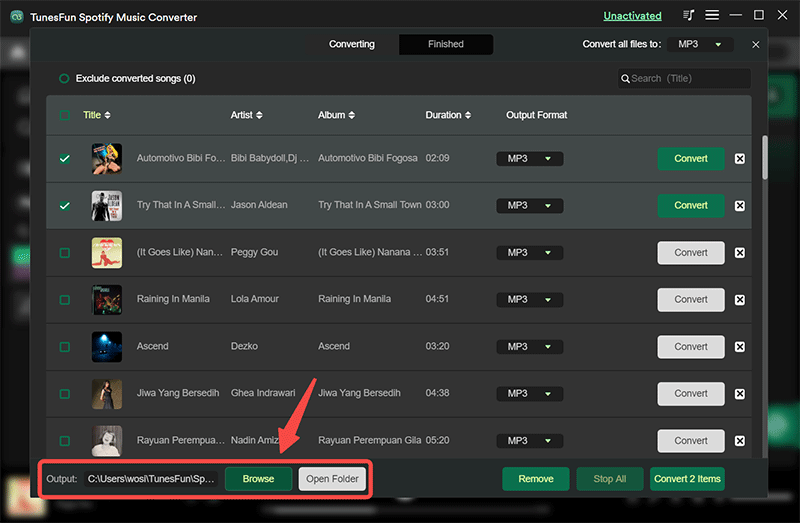
Step 3. Hit the Convert tab and wait until the TunesFun Spotify Music Converter has finished converting all your imported music files!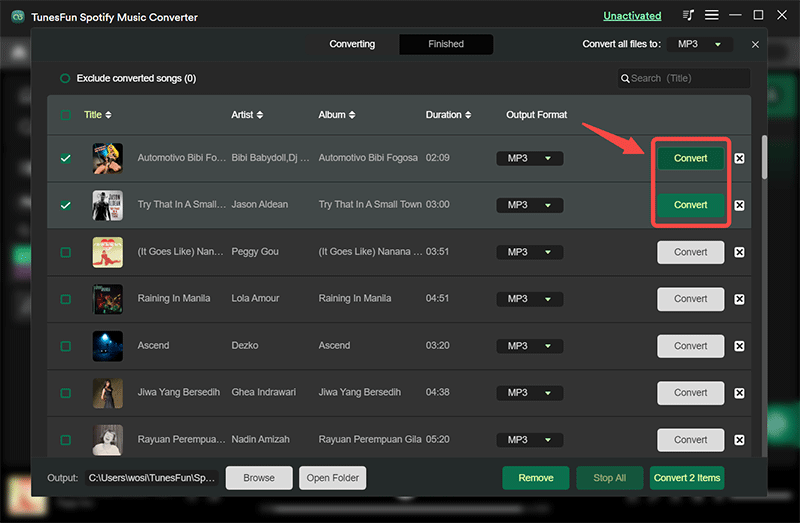
Part 4. To Summarize It All
And we have finally learned about how to turn on offline sync docs on Google through the initial parts of our article above. We hope that we have helped you figure out all the things that you have to do, and be able to do anything that you would like to your Google files even when you are offline.
On the other hand, the same goes for listening to music files you love even when you do not have an able source of internet connection, through the help of TunesFun Spotify Music Converter, anything would be possible, and you would surely be able to listen to songs you love with ease and comfort.
 Home
Home
Leave a comment